10/10/2018
The small saplings of this project began with me considering the possibilities of a typical sculpture; you know, the clichè of moulding clay or some other pliable material in which I could present at the end of the two weeks and go ‘ta-daaa, look how wonderful this is’. Well, that was my first impressions of the title, anyway. Upon further inspection, and guidance, I came to realise that this was art school, and such thoughts need to go to the ground to die. Yes, I knew a moulded piece of clay could possibly become the outcome of my project, however I forgot the most important aspect of my initial thought process; reassess everything I know and challenge it. To truly define the meaning of sculpture. From our presentations, I came to realise it was not the outcome in which was important, but the thoughts and processes behind it. The evidence.
Now what is sculpture? This I pondered over for a few days; not really wanting to commit. But upon contemplation, I registered, whilst staring at a blank page, that I was looking at the very thing I needed to break myself away from. Paper; sketchbooks; evidence. Evidence.
11/10/2018
I see sketchbooks in the vain of fingerprints in the sense that they are unique to an individual. No one thinks the way you think, and thus their originality is something deeply personal to every artist. But they start off as so blank and impersonal; something you have to mould yourself. Considering that, I found that perception of them to be cold and disconnected. Personally I find blank sketchbooks to be intimidating and I am never able to fill them to the extent that I like, wanting to create a thing of perfection as opposed to an object of development, assessment and learning, which is really what I think they should be used for.

Example of an unfinished piece in one of my sketchbooks
Today, I ultimately decided I wanted to begin by making books. I had practiced during my time at Secondary School a few methods of binding paper, so I decided to experiment. With a thick needle and thread I performed a Japanese-style stitch on some spare paper, creating a small, seemingly inconsequential booklet of which I flipped through and played with. I liked it. The feeling of personally bringing it together felt far more personal. The thread was silver; it was pretty. I held a certain power over what I wanted personally in that little book.

Japanese stitch on sheets of paper; created by punching holes and binding with silver thread.
Thinking of this, though, I realise what I was doing was only reciprocating what professional bookmakers were doing: combining ordinary sheets of paper. Though I had control there was still a deep sense of an impersonal disconnection from the actual object itself. Yes, I had made it but it felt very mundane; very reserved in what I could possibly be able to do. I had considered making my own paper previously but dismissed it due to the assumption it would be too hard. But, considering it further, I decided to look up some tutorials to see if it was achievable in the two weeks we were provided with.
I then resolved to watching a very grainy, poor-quality video of an older gentleman describing how to make paper. The endearing-quality to his enthusiasm gripped me almost immediately and I became enraptured with the method of making and the different combinations possible in creating paper. I could alternate colour through inks; change texture and thickness and create different sizes. My mind inevitably wandered and I began thinking of all the other things I could add to the paper – those which were perhaps a little more experimental and could be interpreted as alternative. This included adding natural plant dyes; plants themselves (such as flowers or leaves); glitter; paint; perhaps even things like hair or food. I was enriched with possibilities. Though the process initially seemed to be fundamentally tedious (as creating paper from paper seemed counter-intuitive in all aspects), I realised it was the core processes used in making the paper. With a few scraps of spare paper I could make something rather beautiful. It’s alien territory and the idea of it is troubling, but I’m prepared to experiment and see where it leads me.
I ended up deciding I wanted to make a deckle myself and not resolve to buying any online kits which were available. Firstly, I bought two canvases with the sole purpose of removing the material to extract the frames beneath. This was a cheaper alternative to buying a picture frame or less time consuming than having the two frames made.
Above shows a time lapse of the removal of the canvas from the frames; extracting each staple and ripping out the binding. This was fun. I then had two frames left behind to provide the base of my deckle.
12/10/2018
Now the hard part was finding a suitable mesh for the paper to be created on as the material had to be porous like a softer material but stiff enough to withstand water, such as metal. I attempted to use a soft, costume-style mesh which simply was not suitable initially as it was too thin and likely would not withstand multiple uses; its durability questionable. The latter option was obviously to use metal so I ended up trying a slim aluminium mesh which was soft enough to bend and shape and cut but hard enough to extend its durability and lifespan as it would not rip easily and the likelihood of degradation was far in the future. I wanted to use this over an extended period of time and thus its reliability was important.


The mesh was stabled and duct-taped to prevent any unwanted tears of the skin, as the metal was particularly sharp.
Something I considered doing whilst making the deckle was creating what essentially could be ‘artist books’; a meta way of providing evidence via the use of what could become a final piece. A collection of books, but what could they contain? I began to think of the subject of impersonal and personal aspects; the contrasts and methods to use. If I made a book about myself, I could literally place a piece of myself within it.
16/10/2018
My first collection of paper was created by filling up a basin with water a quarter of the way full (though I later discovered that filling it up further would actually aid me and not reduce the quantity of product filling up the deckle).


I ripped up a small amount of thick paper, which had a subtle yellowish tone. I decided that I wanted to experiment with a thicker consistency immediately so it didn’t fall apart so easily when putting the paper together and pulling it off the grid. This shredded paper was then popped in a blender (along with more water) and blended into a watery, mushy pulp. This was dumped into the basin and it dispersed until the water was opaque. I repeated the process a few times before the water was entirely cloudy and running a hand through it I’d feel some of the particles of pulp throughout it and a slightly thicker consistency than usual. Putting my frame together – with kitchen roll and an array of towels to my dispense – I pulled the frame through the basin of pulpy water… and I inevitably held my breath and doubted the whole process of making the deckle, obviously – before pulling it up and out. And it had worked!! The material clung to the thick mesh, the porous spaces allowing the rest of the water to trickle through. It didn’t seem like much at first, being clumpy and uneven, but I knew it worked and that’s all that mattered in the moment.
I replaced the material back in the water and took better care in pulling the frame through and evening it out when it broke the surface again. I removed the mould of the frame and placed the underneath section (that still contained the pulp) on a towel and squeezed all the remaining water out by blotting it and pressing it with a car washing cloth. This soaked up a large amount of the excess and made it easier to peel off. Now, despite this, peeling it off proved to be rather difficult, a few attempts later proving that using the thicker paper until I got the hang of it was likely a sensible option. 
The result reminded me a lot of what watercolour paper looks like; almost taking on the appearance of cotton. They also seemed to lose their yellowish quality, muting them to a more very pale lemon, or off-white beige. Drying it became an issue, as I had to put sheets of kitchen roll on each individual piece of paper and place heavy weights down on them for an extended period of time. As I was at home when I was doing this, and had to return to University the next day, I had to take measures to ensure they were dry whilst transporting them. I’d heard that ironing them was a method I could use to reduce the time and also flatten out any unwanted bumps along the way, which is what I ended up doing. Since they are now dry, there is a rugged, imperfect quality about the pages which could only be achieved as they are handmade, which I really like. Some of the texture was picked up from the kitchen roll and is pressed into the material, others are slightly torn or ragged around the edges from a slight lack of pulp in one area, or crudeness in removing them from the deckle. I don’t see this as an issue if I’m honest.
22/10/2018
I decided to put together my first official collection of paper by the same method that I tested out on the scrap paper; the subtle and rather easy Japanese stitch. I used a stark black thread that contrasted the pale and washed out colour of the paper to give it a more striking appearance.
This time-lapse depicts the process in which I used to create the little book; by clamping it down with a couple bulldog clips so I ensured that no matter how much I moved the piece around, the paper wouldn’t slip and adjust, with scrap paper underneath so the clips didn’t create indents. So it basically made my life a lot easier.
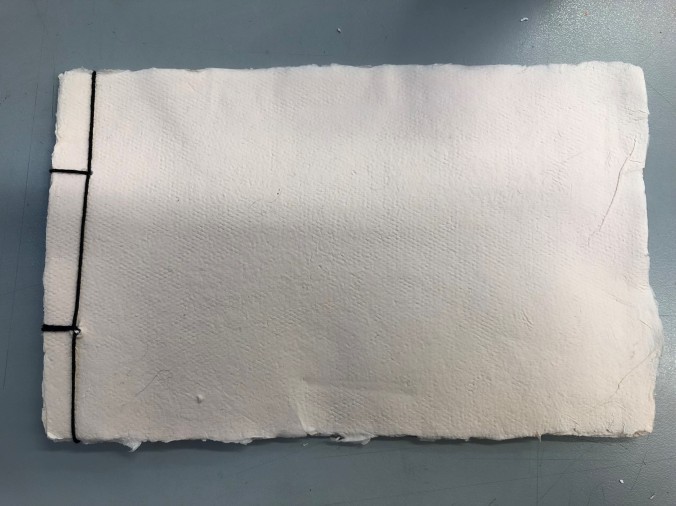
Here is the end result in all its rough glory. Some of the edges of the paper (as you can see) are ragged and untrimmed, definitely giving it a hand-made, authentic feel. The downside to this is that it could be seen as unfinished or lazy, its ‘roughness’ a direct comment on the work possibly. But personally I like the ruggedness of it and making it trimmed and picture perfect juxtaposes the initial message and aim I had for the project; making what is initially impersonal, personal and real. A perfect image would seem like it was produced in a factory, whereas it is clear that this was made by a real person, by real hands that spent a lot of time on it.
25/10/2018
I ended up making a lot of paper, all of which is still drying as I write this. As I don’t have enough time to thoroughly complete what I aimed to achieve, I am going to write a plan for the future, so I can return to the project over time and add things as I go on.
- Make a large selection of books and paper, all pertaining to differing themes visually. For example, following a colour palette; adding the plants or organic objects to see if they hold; add colours or glitter, or other features to make them original.
- Begin to draw in them. This, I think, could act as either travel journal, a diary (to relate back to theme of the impersonal comparing to the personal aspects of drawing or writing), or small sketches. This will complete an artist’s set of books, of which can be returned to and interacted with on a larger scale.
My project is only at the stage of being a sapling; it has more potential and definitely more room to grow.
